Showing posts with label DIY. Show all posts

Tuesday, January 28, 2014

diy dryer balls

In an attempt to rid our home of unnecessary chemicals, I discovered dryer balls. They are wool balls that have been felted. Think of the time you washed something wool and it came out doll-sized and stiff; that's felting. I use them in place of dryer sheets. 

With their bouncing action and absorptative properties, dryer balls cut the drying time of your clothes down substantially. They also combat static, but I throw in a couple large balls made of tinfoil for good measure. I love how soft it makes our clothes!

So, how many do you need? Well, it's up to you! I use 8 tennis ball-sized balls with each load. You could use more or less. I like to have a bunch, as they tend to sneak out of the dryer one at a time with the laundry. 


One thing to note, you must use 100% pure wool. No blends, and no Wool-Ease (wool that is designed to be washed). You could also unravel that super itchy sweater you never wear and repurpose the yarn for this project.


Dryer balls are a super easy and fun project to make. Gather your supplies, put on a movie, and start wrapping!


Skill: Very Easy
Time: 10-20 minutes per ball, depending on size desired
Materials: pure wool yarn, crochet hook, pair of old pantyhose

(There are many other similar tutorials online, mine is just one of many.)


1. Start the ball by wrapping the yarn around two fingers 5 times.


2. Slide the yarn off your fingers and wrap it cross-wise five more times. Then, pinching your little starter, continue to wrap the yarn around and around.


3. Wrap! This is the dull part. Hence the movie. Have a "ball" with your friends and make them together. Friends always share their balls.  In no time, you'll all be ballers. Shot callers.


Engh! Much wrapping. So yarn. Wow.


5. The finished yarn ball, wrapping stage. Your balls may be smaller or larger. 
I won't judge you either way.


6. Now, fetch that crochet hook your grandmother gave you for your 12th birthday that you have always felt guilty for never using. Use it to pull the tail of your yarn ball through the wrapped yarn. If you don't own a crochet hook, go find a pirate and ask them to help you.


7. Trim the end of the yarn, as close to the ball as you can.


8. Then, grab those old panty hose, cut off a leg, and stuff your yarn ball into the toe, knotting the nylons up between balls. Oh, you knotty balls!


9. Once you have your balls made and stuffed into the pantyhose, throw them into the wash with your other laundry. The hotter the water, the faster they'll felt. It may take up to 3-4 cycles to get them felted.

What does it look like when they felt?


The yarn fibers bind together, and you can no longer pull the threads away when you pinch the ball.

Congratulations! You now have a batallion of dryer balls. Cut them free of the nylons, and throw them into their inaugural dryer load. Then listen to the sweet sound of money, and the environment, being saved.

Now, please join me in rockin' out to AC/DC:


Friday, January 24, 2014

diy sweater pants


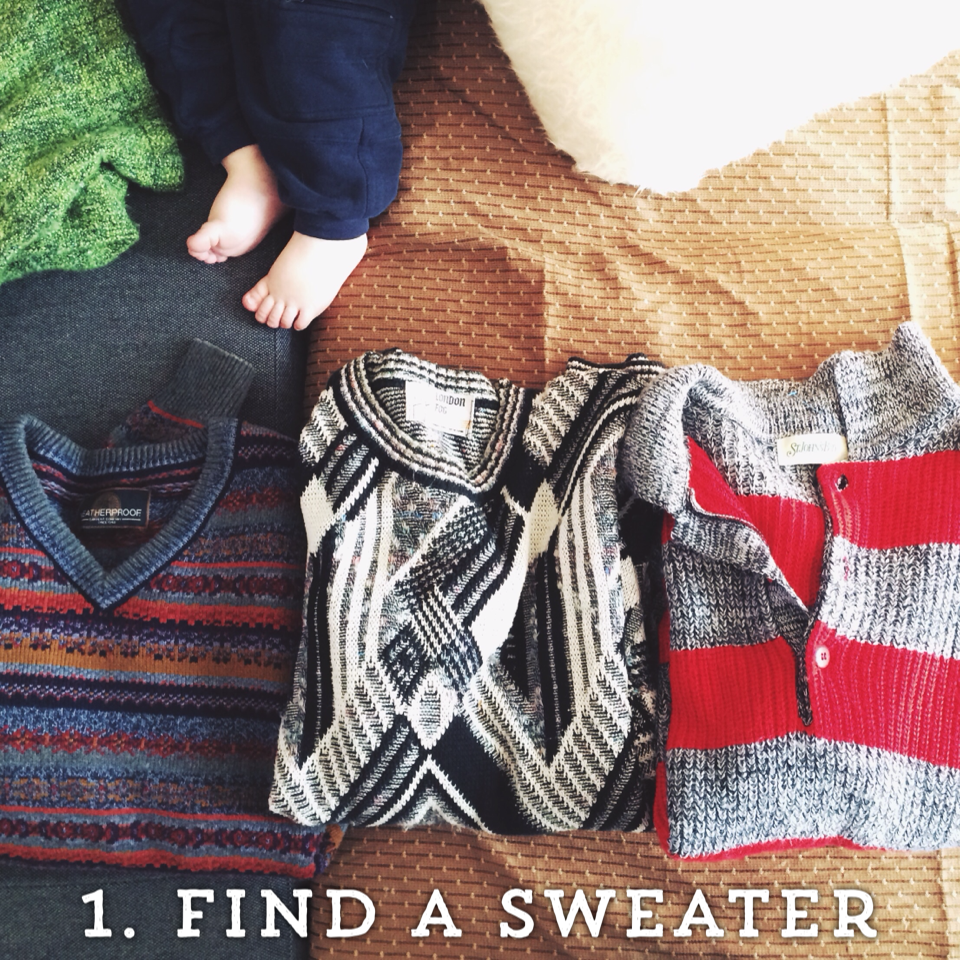
Are you cold all winter? Do own sweaters that languish on a shelf in your closet because they are too big and busy? Let's put those threads to use!

About a month ago, my mom posted a link to a video of people dancing in pants made from sweaters. And I mean, dancing. In sweater pants. In public! They were invented by a textiles savant named Stephen West of Westknits. Leave it to an expat Midwesterner to invent such fun and warm pants.


I fell in love. We made some swants. And they were good. Check out Stephen West's tutorial. He's brilliant and generous, and I love Westknits. His site has more fabulous pictures of swants and textile projects. 

However, I wanted to put my own spin on the fab swants. I wanted sweater pants that were more fitted, like leggings. So, I devised my own version of swants. 

How are your sweater pants different from swants? Are you too good for swants, you piggy-backing thief?


No! I love swants. LOVE SWANTS. My sweater pants are different, thus: instead of placing the sweater arms directly over the legs, with the collar/neck hole beneath the crotch, my pants cut the sweater in half and place the collar to the outside of each leg. 

While I was making swants for my mom, it was awkward to try to shape the crotch (hey, Mom! How's it hangin'?). The result of my swants was a saggy crotchal area (crotchal is a technical term, fyi). My pattern take that fitting outward, toward the hips. Anyway, let's start with the tutorial, shall we! It's easier to show you. 

DIY SWEATER PANTS

Skill: Basic
Time: 3-ish hours
Audience: Everyone! Women, men, children. This project is easily adapted for pregnancy.
Materials: Sweater, thread, needle, scissors, safety pins, and shorts that fit you comfortably for sizing
Optional: 1" or wider elastic waistband or belt, sewing machine

Tip: Like any project, read through the directions and look at the pictures before starting. It goes a lot faster if you have an idea of where you are going. 


What kind of sweater? That's up to you! As Stephen West says in his blog, a medium-weight knit is best for ease of sewing. 


The arms of the sweater should fit comfortably over your legs/thighs. Too loose is better than too tight. 


So, you've cut your sweater into three pieces. The first piece will be the waistband. The second cut results in the two legs of your pants. Arrange the two halves so that the collar holes are at the hips. 


This is where the magic starts! Take the two sweater arms and put them on, one at a time. Tuck the tops of the pants into your shorts. This will make pinning the center easier. If you want, have a friend or someone you trust help you pin this area. It doesn't have to be perfect. 


Remember, it doesn't need to be perfect. We'll go back to this area once we've gotten the hips sewn. Use a running or whip stitch to do this. Don't know your stitches? Download and print this handy guide.


What your quickly-sewn seam should look like. Starting to look like pants! Squee! 


Before you put your pants back on, turn them inside out and use your well-fitting shorts as a guide to pin the hips. This will make the fit a little easier and more even. I tried putting the pants on first, then pinning… not recommended. It will skew the center line and leave your panties in a literal bunch.


Once you've gotten the hips pinned, slide your pants on and check the fit, tightening or loosening where necessary.


Trim the extra sweater bits and using a whip stitch or a blanket stitch, sew up the edges of hips. Keep the stitches close together and snug, but not so tight as to pull out the weave of the sweater. A 1/2" seam is safe. If using a sewing machine, use a stretch stitch and not a zig-zag stitch, which can make the seams lumpy. On your machine, if it has a key, the stretch stitch looks like a bunch of equal signs that got smushed together, or maybe a I Ching symbol. NO ZIG ZAGS. No.


Now that your hips are sewn, you can go back to the center of the pants to tighten up the crotch/butt area by cutting out the extra fabric and sewing it back together. This can be a bit of trial and error.

If you're wanting to do lots of high kicks or would like a nicer fit, I recommend placing a diamond-shaped gusset at the crotch. I didn't photograph this step, but here is a link to a blog that has photos of the gusset technique. Not sure? Do a couple of high kicks and your pants will make the correctly shaped hole for you. 


Remember that lonely bit of sweater we cut off in the first step? We are going to use it to sew a fold-down waistband onto our pants! Now, if by some chance you have a really large sweater and no need for extra fabric at the top, skip this step and use your sweater bit as a neat infinity scarf. However, most sweaters will need this step.

Slip the ring of fabric around your hips. If it is too tall, cut it down to the height you would prefer. If it is too wide, pull the ring snug, but not tight, around your hips. Pin the fabric, cut off the extra, and sew up the edge. Replace the waistband, sliding it down so that the band and your pants are at a similar height on your hips.


Your pants will not be the right height, most likely longer in the front than in the back. Use the waistband as a "leveler" and pin it to the pants. Trim the extra material that sticks out.


Once you're pinned the waistband, slip off the pants and whip or blanket stitch the top of the pants. The photo above shows the waistband after it has been sewn onto the pants, and unfolded. If you are pregnant, sew the waistband on so that the seam is on the inside when it is unfolded.


And, you are done! I hope that you have fun with your new sweater pants. Feel free to post questions about the construction, if you have any, and I will do my best to answer.


And finally, gratuitous photos of me posing in my sweater pants, with my son.